Installing Particle Flocker is very easy. Once you have purchased a license you will be sent an email with your Particle Flocker account credentials. If you have purchased a license and have not received your account credentials please contact support or use the Reset Password page to reset your account password.
This guide is split into the following sections:
- Accessing the Installer and License
- Windows Installation
- Linux Installation
- Launching Particle Flocker
- Providing a Node-Locked License
- Activating the 14 Day Trial
Accessing the Installer and License
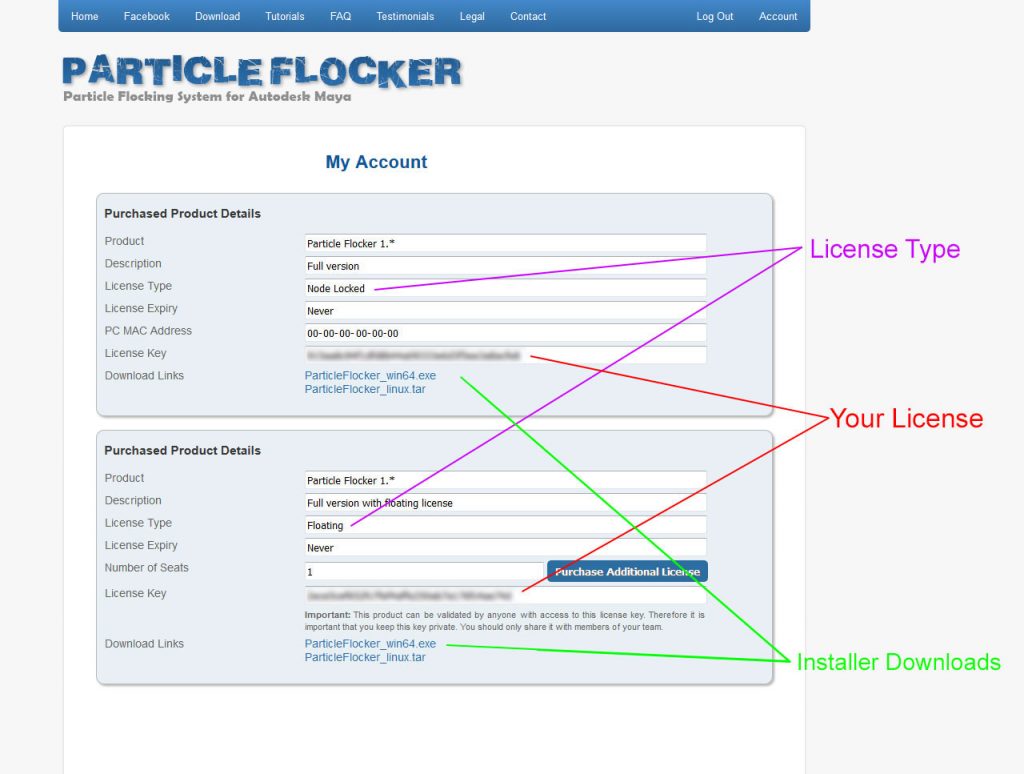
Installers and license information can be downloaded from your Particle Flocker account page.
http://account.particleflocker.com
You can see the locations of the license and also the download links for the installers depending on your license type.

Once you have downloaded your installer you simply need to follow the installation instructions for your particular OS.
Windows Installation
Wizard Installation
To install on windows using the installer wizard:
- Double click on the Particle Flocker installer executable file
- Click through the various prompts as required
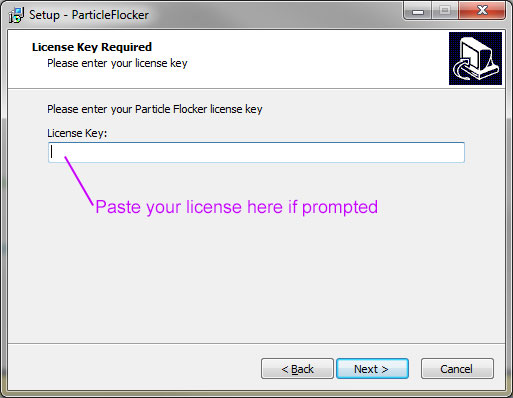
- If installing a floating license, copy your license from your Particle Flocker account page (see above) and paste it into the box when prompted. (If you are installing a non-floating license version, you will be prompted to enter a license or begin your trial period at a later stage.)

- Click finish to complete the installation
Command Line Installation
You can also install Particle Flocker using the command line. Typically this method will be used by systems administrators who need to install the software onto multiple computers.
- You can view all installer options by using /? option
ParticleFlocker_win64.exe /?
- If installing a floating license use the /LICENSE option (This is an additional option not shown in the standard options). You can specify the actual license following an equals sign:
ParticleFlocker_win64.exe /LICENSE=12345
Linux Installation
To install on a Linux computer:
- Extract the .bsx file to a directory on your computer
- Open a terminal and navigate to the extracted file
- Execute the file by using the sh command, for example:
sh ParticleFlocker_linux.bsx
- You can also view all command line options with the [-h] flag
sh ParticleFlocker_linux.bsx -h
- If installing a floating license use the [-l] flag followed by your license key:
sh ParticleFlocker_linux.bsx -l 12345
Launching Particle Flocker
Once Particle Flocker has been successfully installed you can immediately begin to use it by loading any supported version of Maya.
In Maya you should see a new TechToast Menu at the top of the window (unless you are using the Render-Only release which has no user interface tools). You can launch the Particle Flocker Window by clicking on the Particle Flocker Window… menu item.

Providing a Node-Locked License
If you are installing a non-floating license version you will be asked to input a license the first time you try to open the Particle Flocker window.

Simply copy and paste your license from your Particle Flocker account page into this box. The license you enter will be saved in your preferences and once successfully licensed, you will not be asked to provide a license again.
Activating the 14 Day Trial
If you are installing the trial version of Particle Flocker you will need to press the I don’t have a license button shown above. This will bring up a new dialog prompt asking if you want to start the trial. Simply press the Start Trial button shown below:

Once activated the Particle Flocker Window will open. You will notice that your remain trial period will be shown at the top of the window:
